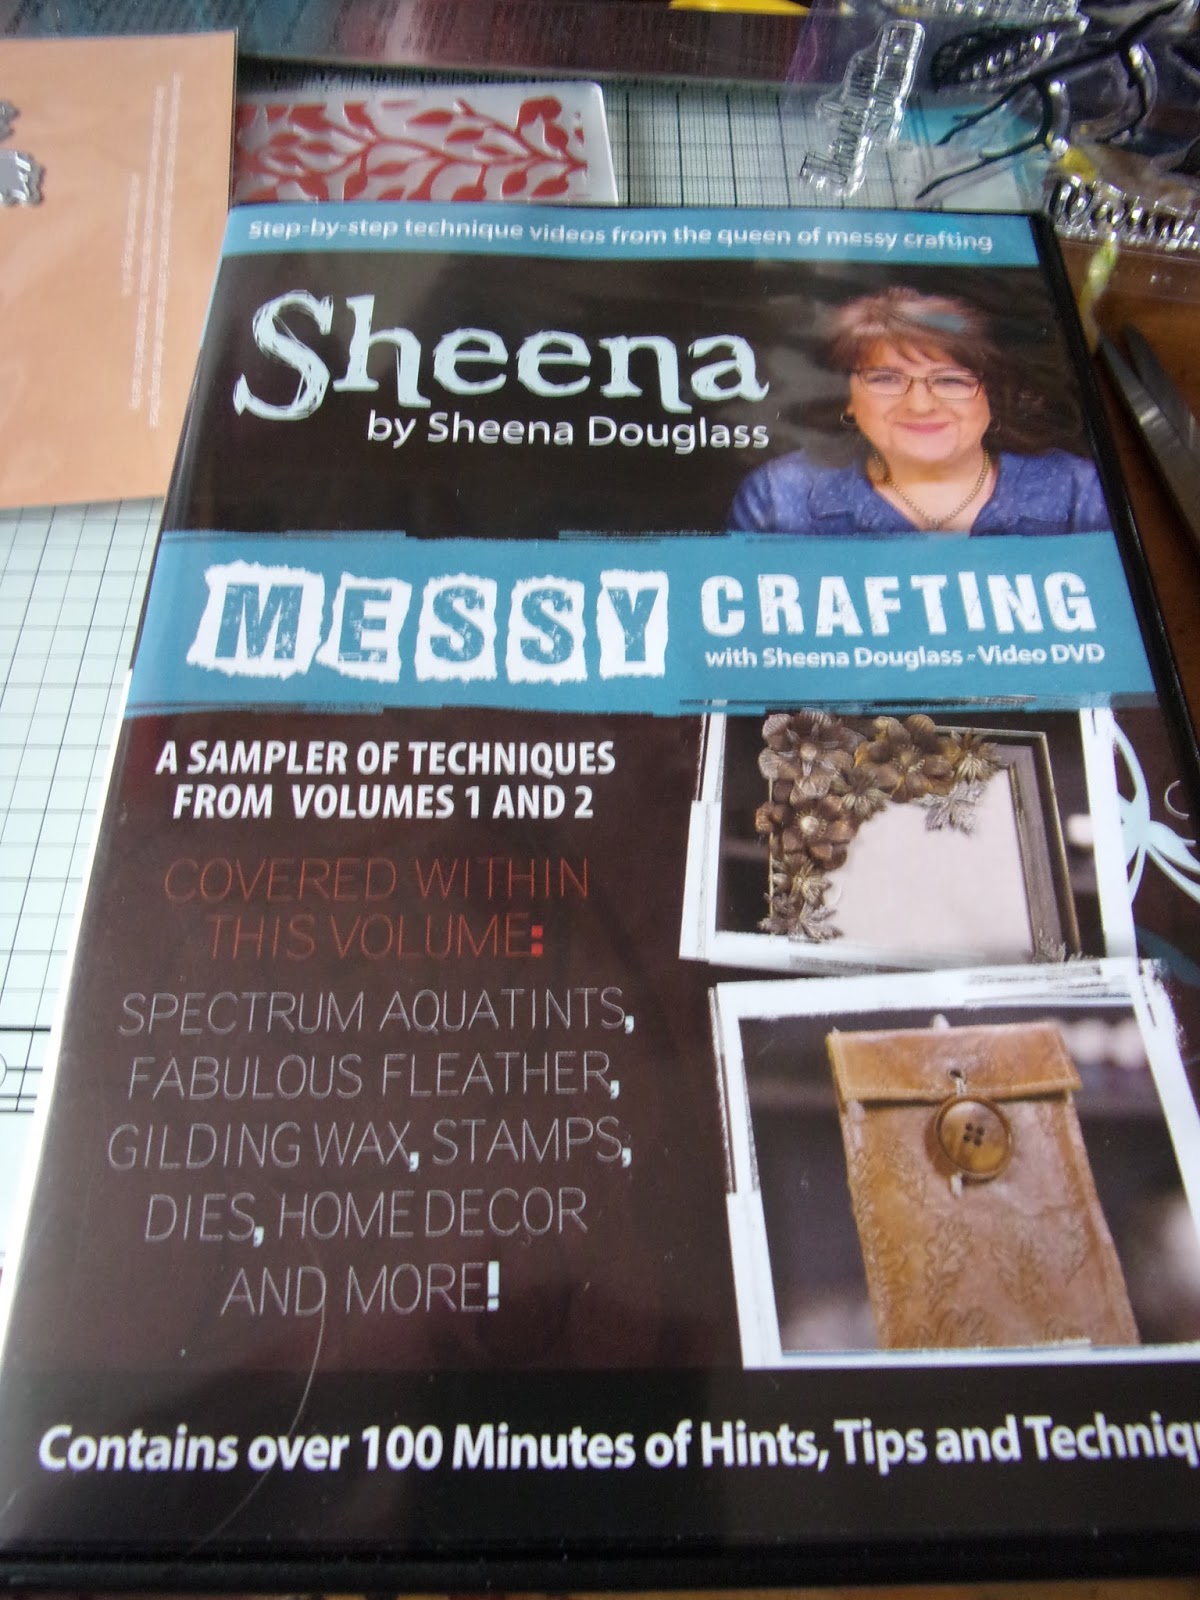
Hiya guys, this is the first time i have ever purchased one of these magazines by the crafters companion peeps, im not a card crafter, i make cards at christmas and the odd one here and there but thats it....i do however cross alot of the card making materials over to other crafts and because the 'freebies' with this issue were my sort of thing and the cost for those alone was worth it to try them out, i went for it.
I have to admit i watched all the demos on Hochanda very carefully once i had decided to try this magazine.
anyway onwards.
The Magazine itself : fortunately or unfortunately depending on the point of view, i have been very poorly of late which was actually the perfect time to browse a new magazine...what did i think???? well im intruiged, love the lanterns and some of the tips, love the product ads that allowed me to check out what was about.....even loved some of the cards although i doubt i'll make them....and as the magazine was, for technically the freebie lol i was very happy with it and certainly wont be throwing it away.....
The Stamps: This was one of the reasons my interest was caught, love leaves and anything woodsy, they will be great stamped into/on all kinds of media and worth adding to my collection. The Picture below shows the results of me having a little play, the background is coloured with washed inktense pencils. I found the shading on the leaves heavy stamped in black ink, but think the solution to this is simply a different coloured stamping ink.
The Dies: The Clincher for me and combined with the stamps, made everything else the freebies lol, these are gorgeous.....would love to get these in the mixed media dies, so i could cut fabrics etc lol
The Embossing folder: When i ordered.. i thought...oh well another embossing folder...since then ive discovered i can emboss powertex'd fabric and the vine effect will and does look stunning embossed, this will be featuring on the odd project methinks lol i love it!!!!!
The Double CD, Messy Crafting: I havent actually looked at this yet, BUT i have seen the shows on Hochanda where Sheena has demoed the two CD's these are from and they are on my wishlist so i will be perusing at some point...and it was free so a bonus lol
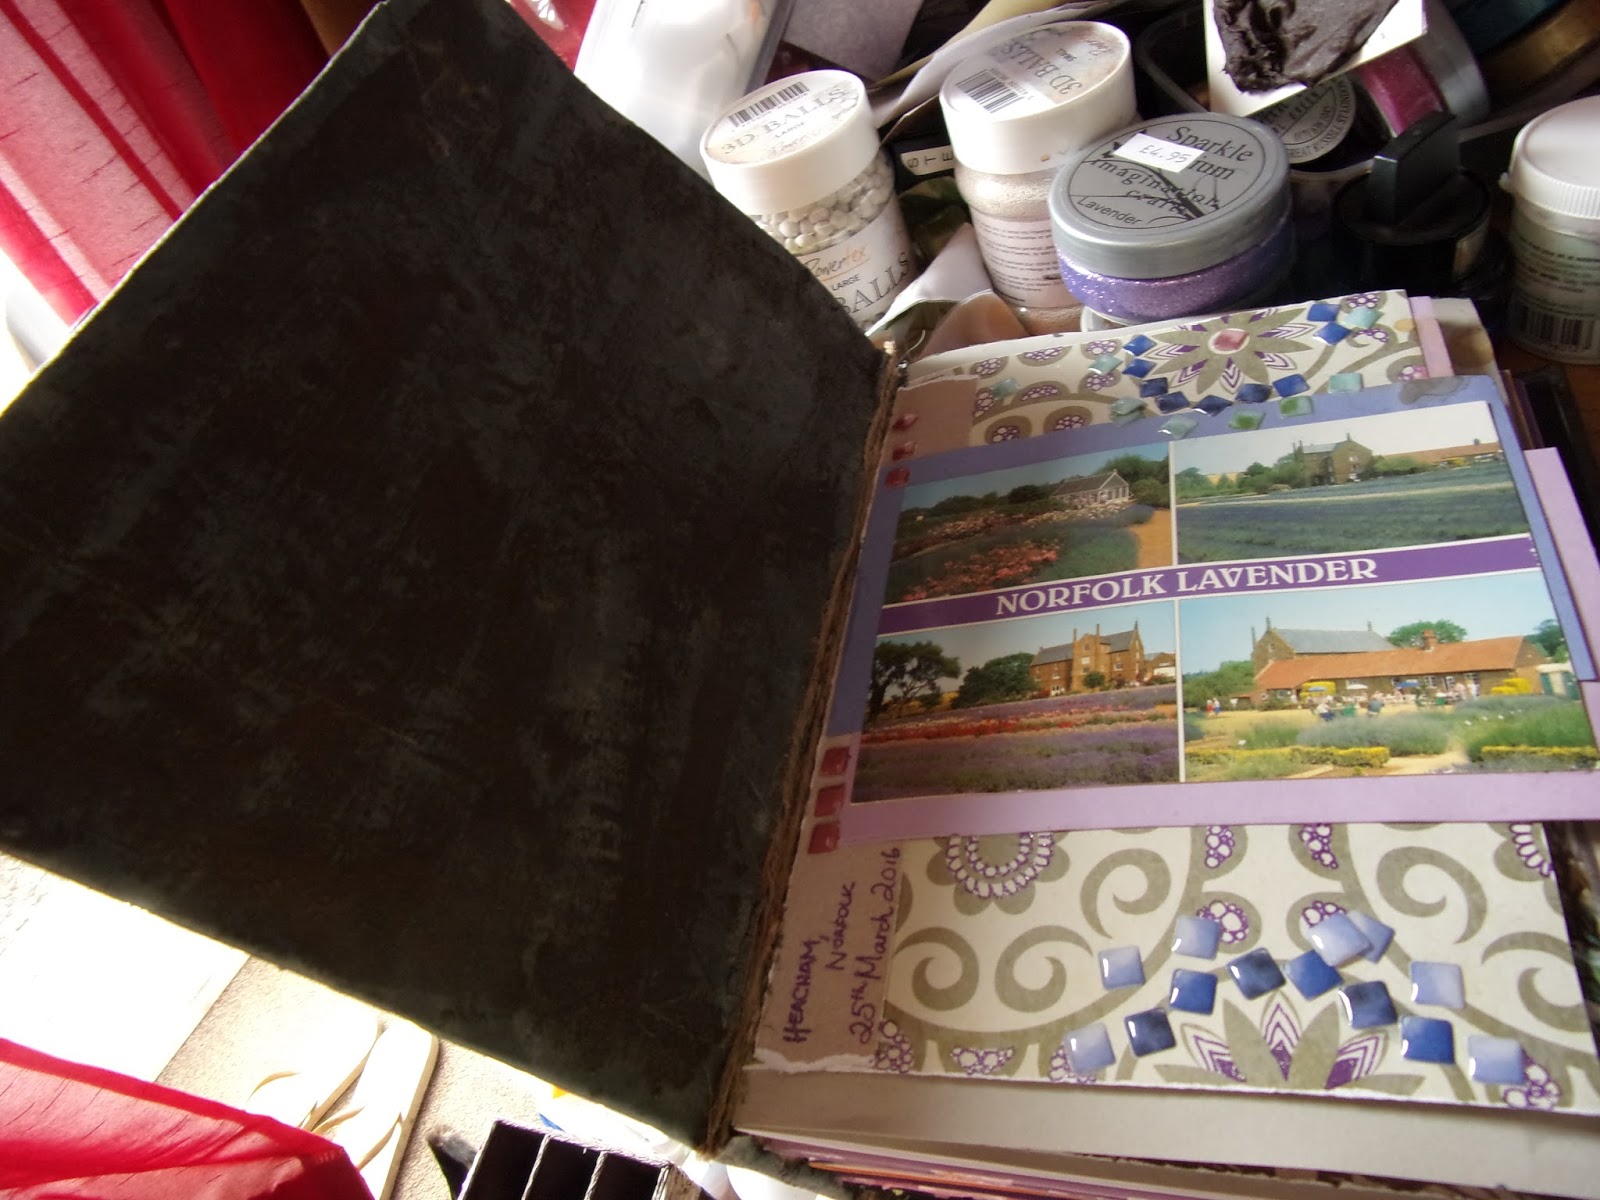
The Double CD, Papers and stuff: This was fun to browse through, the papers are gorgeous and as i like making memory books and the odd scrapbook page, they are a handy addition to my arsenal....The Autumn Morning papers are delicious.
So there we have it.....having played i decided to try and make a card....which is stepped below lol
One of the papers from the CD for a background.
Added the stamped peice of card.
and the peice of embossed fabric.
Leaves cut from cheap brown paper, coloured with pixie powder and raised with the Collal 3D Glue
I varnished the leaves with the stuff that came with the pixie powders, happy accident here as the paper curled slightly which has given them a cool windblown look
All i need to do is add a sentiment and the card is complete.....i am very happy with this. Hope you like it too.
In Conclusion:
Was the magazine value for money?, honestly i wouldnt have bought it without the extras as i viewed the magazine as a freebie and the dies and stamps as the money...however it was a great freebie lol.
Would I buy another issue?, Absolutely yes if there was extras i wanted....for example issue 10 didnt appeal to me personally, but i have seen pictures of Issue 9 and would have loved to have got my sticky paws on that lol...so for a non card crafter it still has many benefits.
What is the Outcome of Issue 11? I want the entire Autumn Morning collection when it is released so it has done it job lol....
If you are tempted by these magazines even for the 'freebies' i say go for it, it made a poorly non card crafter very happy and there is lots to play with.
Hope you enjoyed this review and found it helpful, ive never done one before so any thoughts about what i might have missed...let me know.
Good Morning, another roasty toasty day today which is great for drying out powertex projects....i havent taken many pics of this in progress as i got seriously caught up making it and forgot....as Leonie Pujol says 'Sos'. The cogs are a Sissix bigz die, the background is lead powertex and i have used some of their texture medium in this project, the feature of the book is the rust powder which gave the cogs that lovely rusty look...and the book a slighty vinegar stink lol. A big thanks to Hochanda for introducing me to the lovely media i used for this project.
TOP TIP: Personally i found that mixing a quantity of rust powder with powertex and storing it overnight in a tub so it can 'go off' gave great rust, you will have to stir again before use but its worth it. Also after experimenting white vinegar mixed with water produces fab results. I sprayed the area i was working on and left it, once it looked vaguely dry i sprayed again, repeating until the rust was the colour i wanted...then i varnished.
Peeping inside the book, the inside cover has a faint rust to it and the pages are made from random papers, alot of which came in my secret santa bags at xmas lol.
This is the back of the book and only has 1 layer of cogs.
The Book Spine
This is the cover of the book which has a second layer of cogs, these were painted with gold powder mixed with varnish and then rusted.
So there it is...one of the reasons why im a rubbish blogger lol, too easily distracted. With hindsight the book is quite stiff and difficult to open, if i was to work on a similar project i think that covering the card book base with crumpled tin foil and rusting that will retain flexibility, then the cogs could be added as panels. Its a hefty peice but i love it and i hope you enjoy it too.
Good morning gang...finally finished box No2....isnt it pretty? had loads of messy fun with this one and am really chuffed with the finished peice.
I have used two Colours of Powertex on the box, the clear and the Bronze. Big thanks to Hochanda for introducing this fascinating product into my life.
Below are pictures of the box from all sides and a brief explanation as to what was done...i hope you enjoy.
The whole box is built to hold the ice cube trays that can be used for crafty storage or jewellry. Its all made from Mount Board and Fabric, in this case an old duvet set with felt lining the drawers and held together with a little glue and stitching. Big thanks again toHochanda for the ice cube tray top tip that sparked the idea.
All the exterior stitching is highlighted with a red metallic powder mixed with the Powertex varnish....the embroidery on the drawer fronts is actually from the duvet i ripped and has been highlighted with Gold metallic powder and a green iridescent mica powder. The Drawer Knobs began life as a clear acrylic and were coloured to match with my spectrum noir alcohol pens and then coated with a layer of varnish for protection.
This is the base of the box, i created feet using pistachio nut shells covered in muslin, there is also string and wool running through the base. You will see i have also has a little play with my Imagination Crafts Stencils and Sparkle Medium.
As well as the wool etc used on the base i have also incorporated twisted scraps of waste duvet...for texture and my X-cut 'Handmade with love' Button Die
The Focus of the sides are the enamelled rose plates...i have done several blogs on my cold enamelled roses, this is why i was playing.....they are stuck to the box with Collal all purpose and held in place with scraps of duvet...My subconcious was driving here and i created a rose within a rose.
The feature of the top of the box is the felt roses....felt is very thirsty and soaks up the powertex like there's no tomorrow, however i have found that if you soak the flowers in warm water and then squeeze them to get as much water out as possible, the felt is then less thirsty when you dunk them in the powertex...it does increase the drying time and i had to 'touch up' a few areas, but all in all a job well done.....however, with the frosting on the petals provided by cold enamelling, i think they work quite nicely.....i have also added some of the ribbon roses that Nick Roberts taught me how to make.....he has his own blog and if you click on his name here you will be taken to his video on how to make the ribbon roses.
I do hope you enjoy these pictures and look forward to any questions/ comments.