Thursday 30 June 2016

Playing With Powertex......Box No 1 'Pretty in Pink'


Hiya Gang.....Finally finished my first Ice Cube Box Storage.....i will blog the how to make for the actual box itself at some point but you know me....easily distracted lol...I have used two Colours of Powertex on the box, the clear and the Bronze. Big thanks to Hochanda for introducing this fascinating product into my life.

Below are pictures of the box from all sides and a brief explanation as to what was done...i hope you enjoy.


 The whole box is built to hold the ice cube trays that can be used for crafty storage or jewellry. Its all made from Mount Board and Fabric, in this case an old duvet set with felt lining the drawers and held together with a little glue and stitching. Big thanks again to Hochanda for the ice cube tray top tip that sparked the idea.


All the exterior stitching is highlighted with a pink Mica powder mixed with the Powertex varnish....the embroidery on the drawer fronts is actually from the duvet i ripped and has been highlighted with a lighter pink and Cosmic Shimmer Gilding Wax, Spring Green. The Drawer Knobs began life as a clear acrylic and were coloured to match with my spectrum noir alcohol pens and then coated with a layer of varnish for protection.


 This is the base of the box, i created feet using pistachio nut shells covered in muslin, there is also string and wool running through the base. If you peer you will see i have also has a little play with my Imagination Crafts Stencils and Sparkle Medium.


As well as the wool etc used on the base i have also incorporated twisted scraps of waste duvet...for texture and my X-cut 'Handmade with love' Button Die


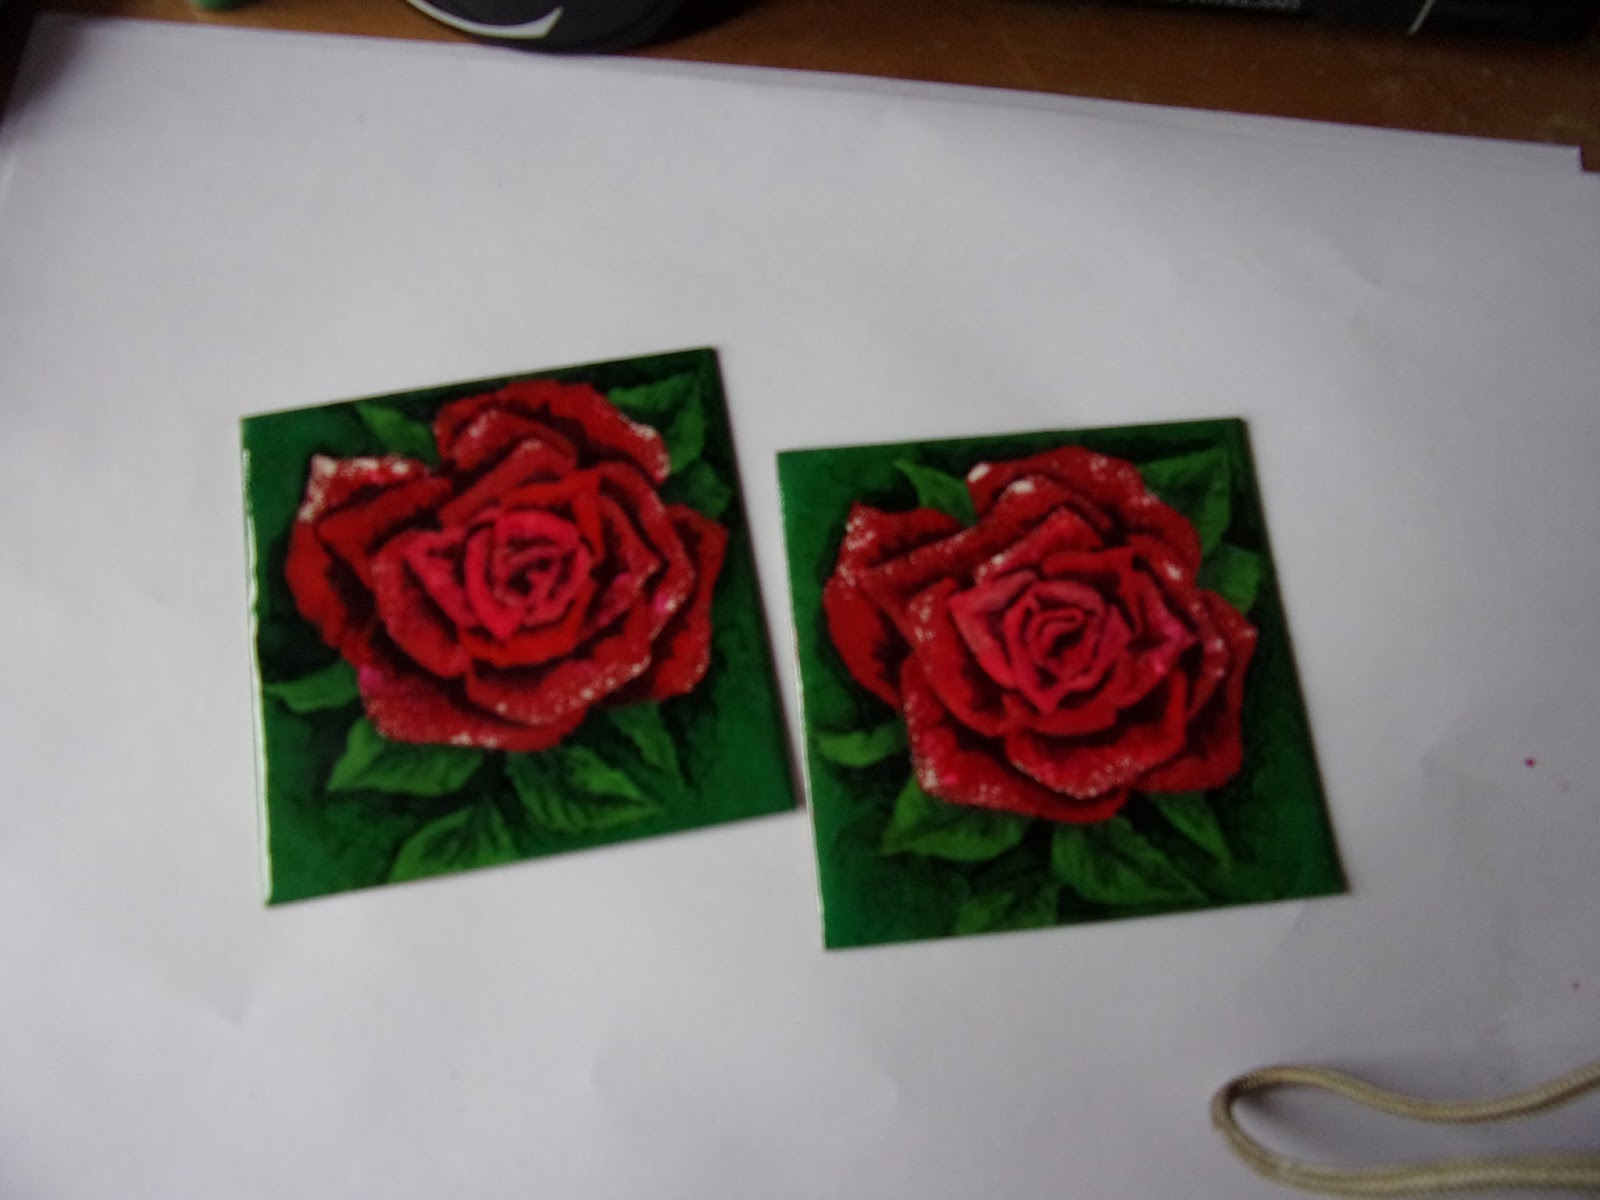
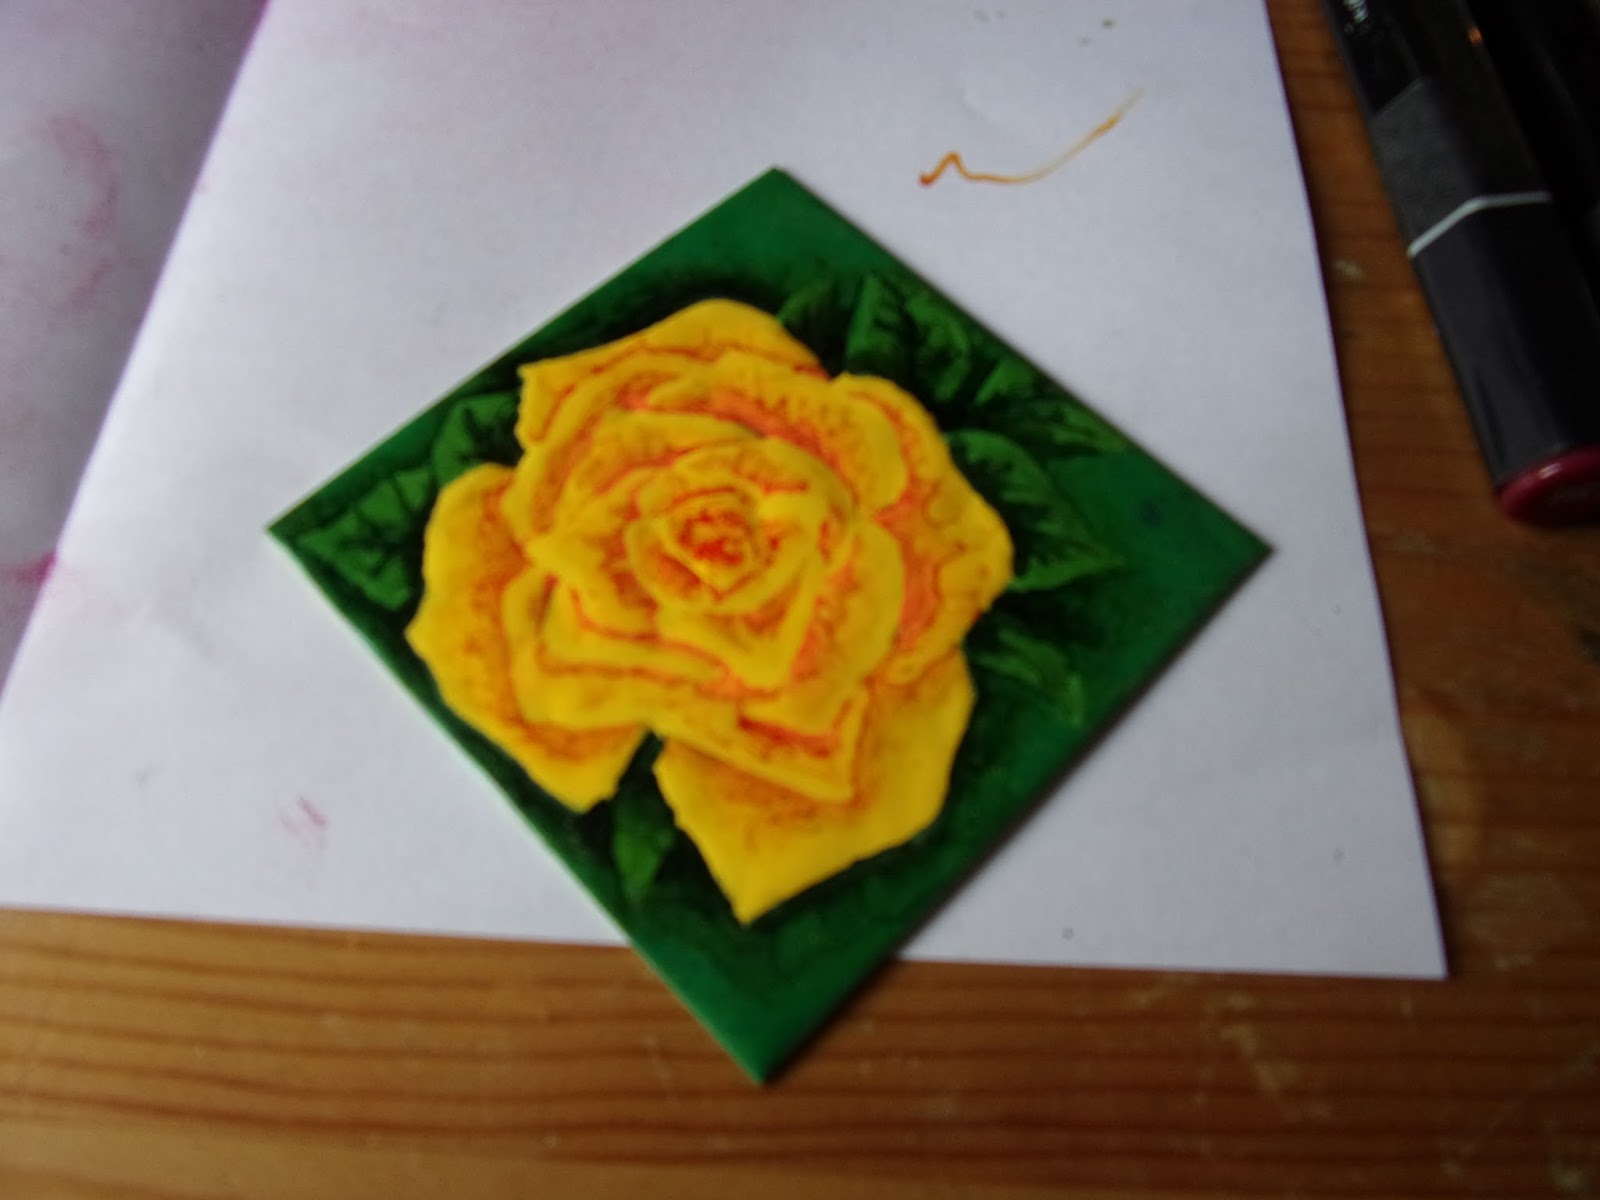
The Focus of the sides are the enamelled rose plates...i have done several blogs on my cold enamelled roses, this is why i was playing.....they are stuck to the box with Collal all purpose and held in place with scraps of duvet...My subconcious was driving here and i created a rose within a rose....i have also added some of the ribbon roses that Nick Roberts taught me how to make.....he has his own blog and if you click on his name here you will be taken to his video on how to make the ribbon roses.


The feature of the top of the box is the felt roses....felt is very thirsty and soaks up the powertex like there's no tomorrow.....however, with the frosting on the petals provided by cold enamelling, i think they work quite nicely.

I do hope you enjoy these pictures and look forward to any questions/ comments. 

Thursday 23 June 2016

Machine Felting Project No 13 : Elizabethan Peg Doll (Queenie)


Ive skipped ahead a few projects to bring you this one as it is one of my favourites, fun to make...i hadnt noticed the resemblance to 'Queenie' from the 'Blackadder' shows until it was pointed out by a certain Mr J. Martin of Hochanda.....i had fun making this and you wouldnt beleive the number of people who peeped under her skirts...lol. Apologies for the lack of pictures...i got lost in the making and totally forgot.

Ingredients

* Wool tops
* Merino wool tops
Peice of Shop Bought Silk Velvet
Peg
Base
Pipe Cleaners
* Collal 3D Glue
Beads
Thread
Card & MountBoard
Jewellry findings and chain
* Cold Enamelling
Tissue

* Items Purchased from Hochanda


1. Peg is Glued to a decoupaged Base, face is drawn on a peice of tissue and decoupaged to the head


2. Farthingale and arms are made from pipe cleaners

3. Underskirt is made from pure silk velvet machine felted with with merino wool, sized and the seam felted together, stitched round open top and pulled tight over body to create skirt. 

4.Large peice of felt was created using mixed red and dark orange wool tops and then a machine felted pattern added with merino wool.

5. Outer skirt,Bodice and Sleeves cut from new felt and seams machine felted together, stitching used to 'ruche' the sleeves and outer dress and then stitch sleeves to top. Top stitched at back...tried to make it criss cross as if lacing lol.

6. Small 'Book' with cold enamelled cover made and fitted to a chain around doll's waist. 

7.String of beads made longe enough to wrap 3 times

8.Small peice of white felt made with merino wool for the ruff and sleeve lace

9.Fan made using scraps of made felt and eyepins....glued to hand 

10. Hand felted Hair peice and fixed to head, then cut to shape.....once glue dry a string of beads added.


Tuesday 21 June 2016

Cold Enamelling, Rose variations


This blog is a small one to show the different variations from the same stencil......the stencil is home made, the image is available on the Rose Blog, i have found it a benefit to laminate each leaf and petal cut so that they are rigid and easy to lift off the tile....But dont panic if you get powder out of place, a soft paintbrush will tidy up in no time.


Ingredients

* Cold Enamelling Starter Kit
* Cold Enamel Glitter Turquoise
* 8cm x 8cm Tiles
* Spectrum Noir Alcohol Pens

*all products purchased from Hochanda

Rose Colourways


This is the original rose i created using pink and white enamel powders and 3 shades of alcohol pens


This Rose has been done just using pink enamel powder and a dark burgandy alcohol pen that i blended with the blender pen.......you can't see in this picture but the petals have also been dusted lightly with mica powder and re-fired before the shading is added. Amazing the difference in the two pink roses just by dropping the white and just using one alcohol pen.


This Rose was coloured with the red and white powders and shades of alcohol pens.....love the way the contrast with the green petals really make the red pop.


In yellow....soft and pretty


A Glitter rose!!! and just one shade of blue alcohol pen and the blender....doesnt this sparkle lol...

Anyway just a small blog to show the variations i have played with.....because you build in layers it takes about an hour and a half to do a rose, but i think the results are well worth it. Hope you enjoy and feel the urge to try :-)...it might seem scarey but its great fun and sooooo satisfying.

Tuesday 7 June 2016

Machine Felting Project No 5... Summer Corsage


Quick blog today as apparently i have chores to do....pleugh.....not many pics but i hope u all enjoy it

Ingredients

* PFAFF FELTING MACHINE
* Variety of Merino wool Felting Tops
  Feathers
* Spectrum Noir Alcohol Pens
* Cosmic Shimmer Glitter Glue...Chic Moss
  Crochet Wool No3 Hook
  10mm Glass Beads
  Brooch Finding
* Collal 3D Glue

* = Items purchased from Hochanda

How To

1. Colour feathers, 2 Yellow, 2 Peach, 2 Pale Green, when the alcohol ink has dried gently brush the feathers so they are fluffy

2. Using Tops make two peices of green felt slightly smaller that overall size required...but bigger than brooch finding. Glue Brooch Finding to one of the peices and put aside.


3. Crochet a loose Doilie to slightly larger than the felt back...stitch on felt back

4.Glue 3 feathers . one of each colour at a jaunty angle top and bottom of the Corsage

5. Make Large Peice of green felt in colour to match the feathers and die cut leaf shapes using Sissix Bigz Dies. (8 in this corsage) 

6.Add Viens to leaves with Chic Moss Glitter Glue

7. Glue 2 of the leaves to a peice of wire and bend them to look like they are trailing, glue to feathers on corsage...keep 4 remaining leaves to one side.

8. Make Large Peices of felt in Yellows and Peach to match the feathers. Use Sissix Dies to create a large layered flower and 3 small blossoms.

9. Stitch a bead through centre of large flower and fix to the corsage...note u can colour a bead to match if u wish


10. Glue in the remaining leaves under petals of flower

11. Stitch beads to the centre of each blossom and fix to the corsage around/under the large flower

12. Fix the Brooch Finding Felt to the backing felt using collal glue....ensuring that the brooch pin is lined as required.


Saturday 4 June 2016

Zentangle Bottles


This Picture came about after reading the book 

*'Colored Pencil Painting Bible' by Alyona Nickelsen

.....instead of doing the sensible thing and trying all the amazing projects in the book i wandered off and did my own thing, as usual, but the book is fabulous and i will do the prjects at some point as they are amazing. I was inspired to share this picture in a blog after Hochanda featured the Derwent colour soft pencils and where i used a blending pencil and solution, the pen they had on their shows probably does the work of both these...

Ingredients

* Smooth White Card
* Derwent coloursoft.....you could also use Polychromos and Lyra pencils
* No 3 & 8 Zentangle Pens
* Graphite Pencil
Blending Pencil
Blending Solution
Paintbrush
Kitchen Towel

* = Items purchased from Hochanda

How To

1. Find a selection of interesting bottle pictures....i used the internet but you could look through books, I chose 3 in different colours that were of similar size. print 2 copies.....

2. Cheat.....use one of the copies to trace the bottles outline onto the Card, including the areas that are to be white and dark...

3. Colour in all the areas that are white and the Darkest shaded areas using a dk blue, its best to start with the bottle that is the furthest away and work forward..i got a little carried away and started on the foremost bottle first. Keep a peice of tissue or copy paper under your hand to prevent smudging of your work.


4. Work the tangle at the same time to ensure they flow cleanly...any area that will be inside/behind a bottle is shaded with pencil rather than the No8 Zentangle pen


5. Once the tangles are laid in and all 3 bottles have their light and dark shading, its time to add colour. Starting with the blue, then the red and green, always colouring into the overlap bottle. Work in shadow around the front bottle.


6. Layer the colour and blend with the pencil and smooth out with the solution...you will also find that you can clean back the white areas and brighten them by wiping them gently with solution and then with kitchen paper. Use a touch of black to add the very darkest highlights.


7. Work in the remaining areas of Zentangle and if necessary, sharpen the light and dark areas on the bottles....Darken the shadows on the green bottle. Dont forget to sign your work and date it....


Afterthought...if you are wondering why i chose a thick smooth card to work on.....it was mostly because its great to tangle on and i was curious to see how the blending worked on something other than art paper...it was great to work on smooth....

Wednesday 1 June 2016

Cold Enamelled Tiles, Rose


More Cold enamelling...this time using a stencil to build the rose

Ingredients

* Efco Cold Enamelling Starter Kit
* Aluminium Tiles
* Spectrim Noir Pens

*Products purchased from Hochanda


Rose template...if i have loaded this properly, you should be able to right click and save picture....

How To


 1. Key two of the aluminium tiles with a peice of sandpaper (i use a nail file)


2. Coat the tiles with the green from the starter kit and then dust in dark green (Green and Ultramarine premixed) and light green (Green and Yellow premixed)...Fire them in your little stove.


3. Use one of your copies of the rose stencil and cut out the leaves...dust through the stencil with the light green and fire


4. Use your alcohol pens to add shading and veins on the leaves.....occasionally allow the ink to pool for extra darkness behind the leaves


5. Using a new print of the stencil, cut out the 3 petals that are at the back of the rose....Colour them with the pink and fire, once the tile is cool add shading with the pink spectrum noirs....cleaning the nibs on paper for colour blends


 6. Repeat 5 but add a little dust of white powder as well


7. Using White as the base from now on, with dustings of pink, repeat the stencils to the centre


8. Add a coat of clear enamel powder


I hope you enjoy this and look forward to seeing pictures....:-)